Mix A Track With Me: Part 2 - Creative Mix Techniques
in this article I will go in-depth into some creative mix techniques that are sure to make your mixes stand out from the crowd, Such as Serial Compression and Side-Chaining - which you can then implement into your mixing sessions.


Hello my fellow mix engineers, it’s Sky here on aux again. And this is part 2 of my ‘mix a track with me’ article series!
In part one I walked you through how I would go about mixing a track, covering the core mix techniques I use every day such as Gain-staging, Soft-Knee compression, and Equalisation. As well as a step-by-step mixing sessions guide.
But that was only the start, in this article I will go in-depth into some creative mix techniques that are sure to make your mixes stand out from the crowd, Such as Serial Compression and Side-Chaining - which you can then implement into your mixing sessions.
If you haven’t read part one I would highly recommend going and doing that before you read this one. Don’t worry - this article will be waiting right here for you, ready when you’re ready.
Part 1 - https://aux.app/connect/mix-a-track-with-me
Now let’s get into it.
Side-Chaining
Something I personally struggled with for a while was masking within my mixes. This is when different instruments/elements of a mix sit within similar parts of the frequency spectrum resulting in one or both of them becoming hard to hear.
One of the most common examples of this is the bass masking the kick drum.
To prevent this you can use a technique called side-chaining.
For this track that I'm mixing with you, I have side-chained the kick drum to the bass.
So that whenever the kick hits, the bass drops out slightly.
This helps with masking as the kick and bass sit within similar frequencies and is a very common technique used in rock and dance music.
To implement this technique -
- I set up a compressor on the bass track.
- I then selected the side-chain and sent the 'kick out' to it.
- Set the frequency to about 123Hz. As that’s where the fundamentals of the kick sit.
- And set the Q to 0.71 so it covers the full kick.
- I have a second compressor on the same bass track with the 'kick in' sent to it, with the frequency set to about 100Hz.
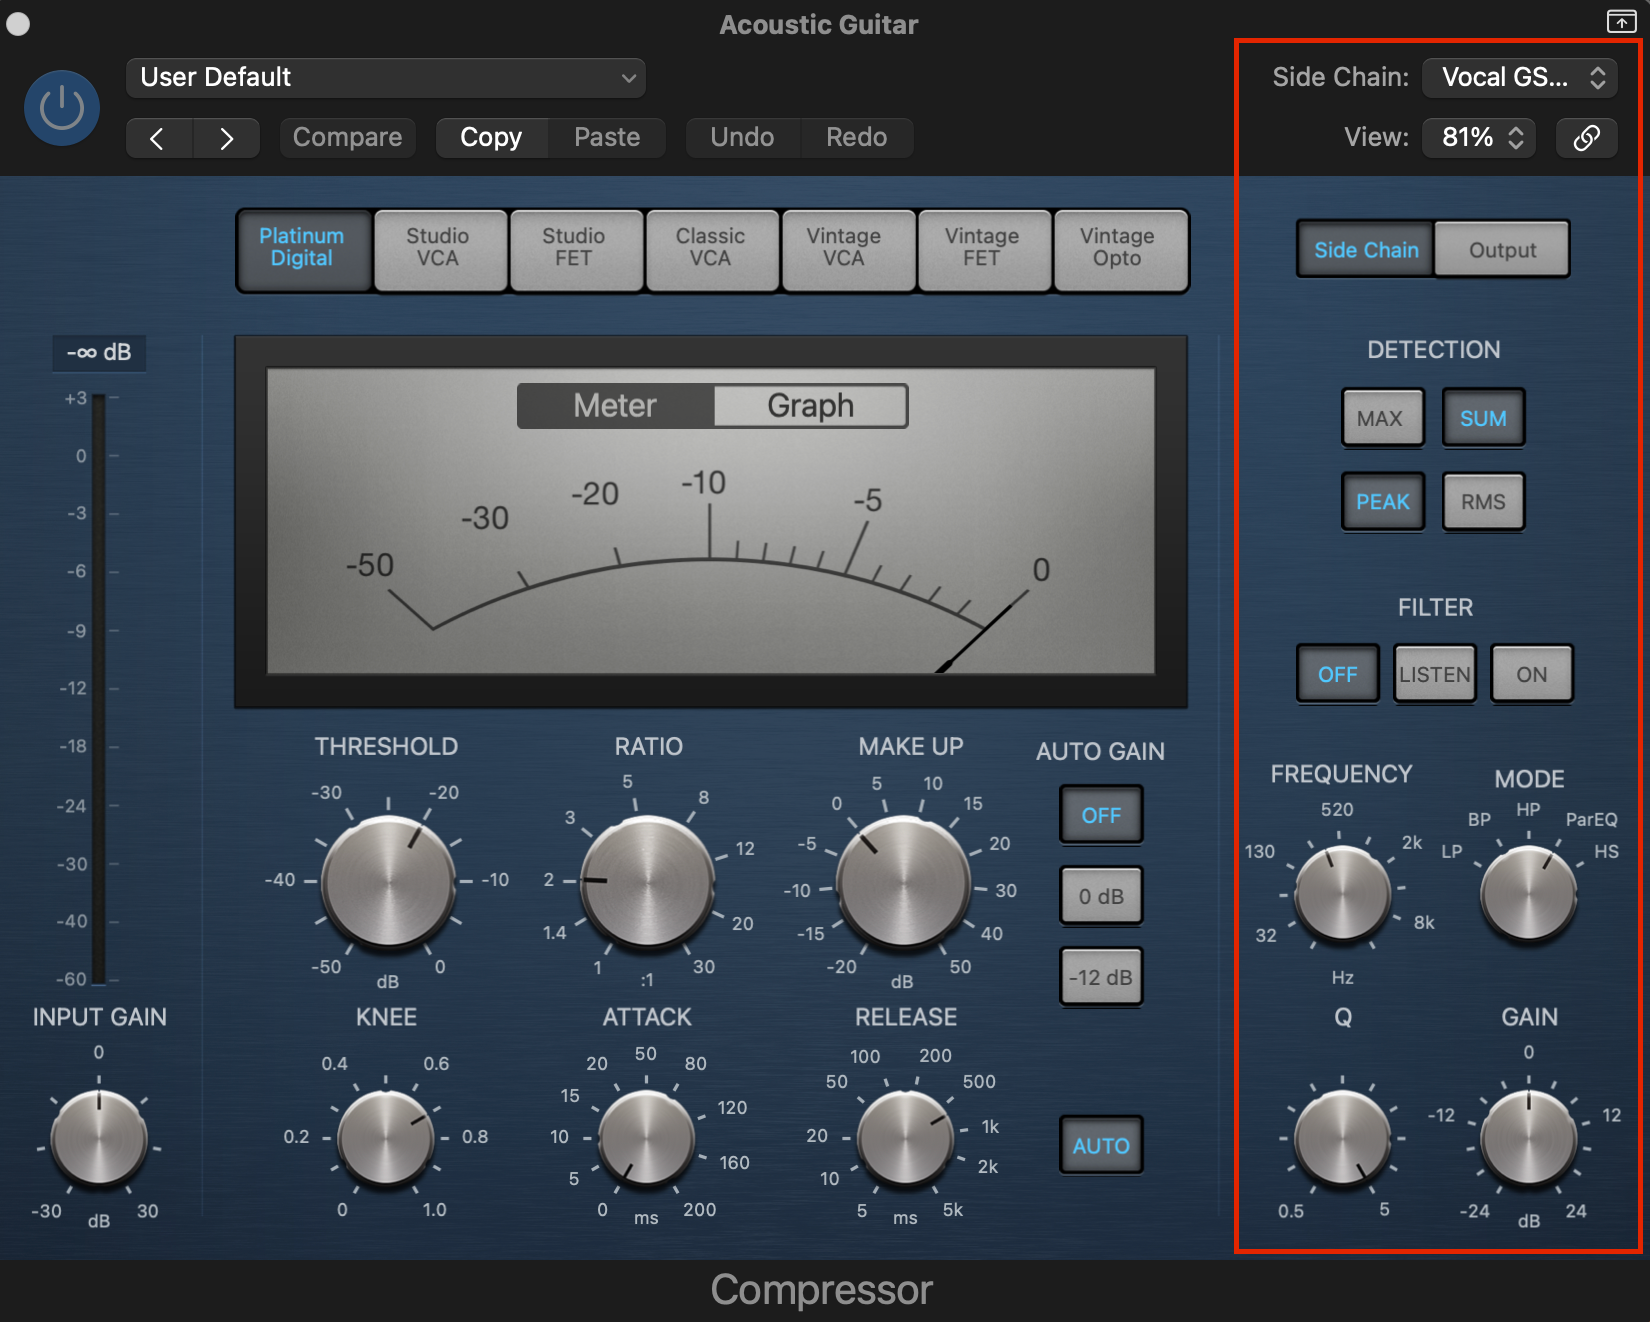
Tip - you can check where your instrument is sitting within the frequency spectrum by looking at the channel EQ.
I also use side-chaining when mixing songs with only vocals and guitar/piano.
I used to find it difficult to create definition between the vocal and instrumentation but when I figured this trick out it changed my life.
Just side-chain the vocal to the guitar - it's that simple.
Serial Compression
In most genres of music including rock, the vocal is arguably the most important element… or at least the element the majority of people are paying the most attention to.
Something we all want in our mixes is for the vocals to be upfront and clear without them sounding too harsh or over-processed.
To get this desired effect when I mix I use serial compression.
Serial compression is when you use multiple compressors instead of using just one. This means we can build up our compression over multiple compressors instead of doing really hard compression over a single compressor.
Something I like to do is research the effects chains used on my reference tracks and try to copy them using the plug-ins I have.
For example, as I am mixing a rock track I researched Mike Stent and his work as the mixing engineer for MUSE.
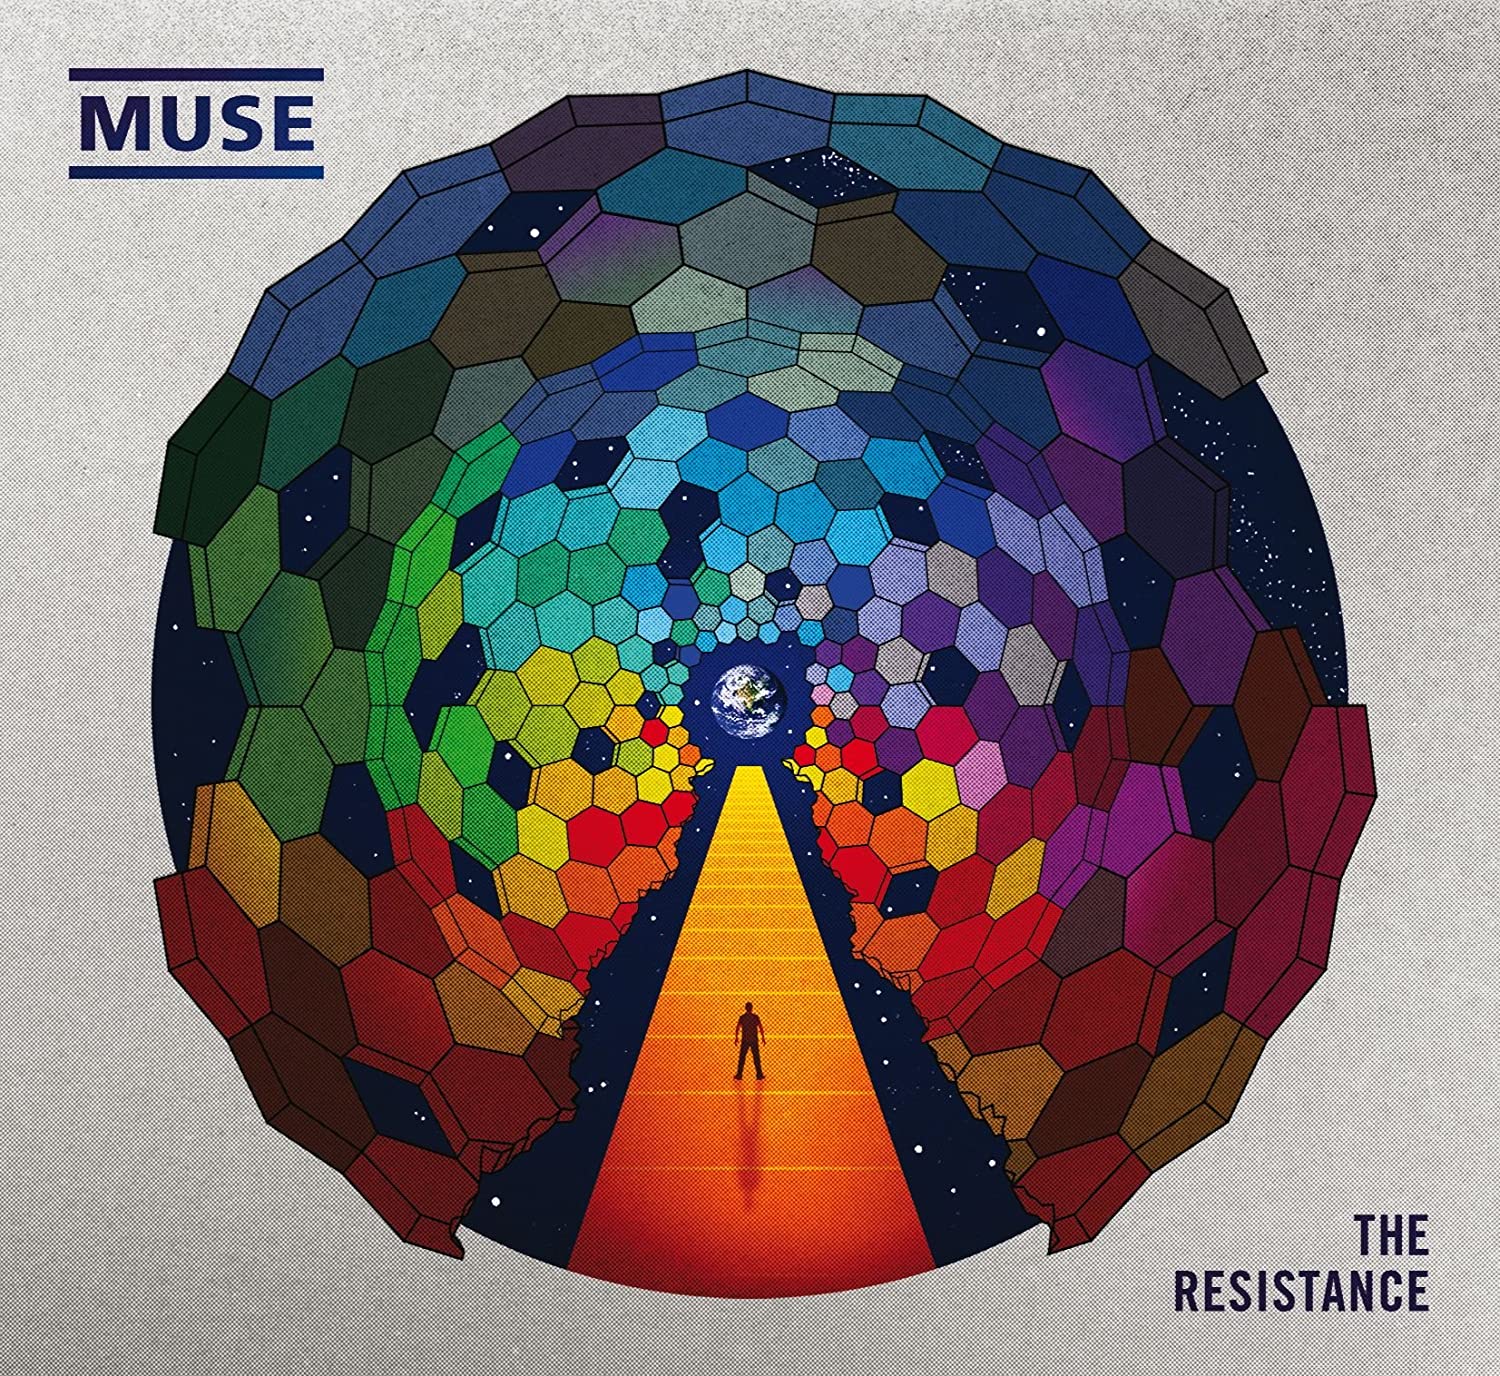
The series of compressors Mike Stent used when serial compressing the vocals on uprising consisted of The Teletronix LA2A, Universal Audio 1176, and Standard Audio Level-or which is ultimately a limiter.
I am now going to show you how I would re-create this using Logic stock plug-ins.
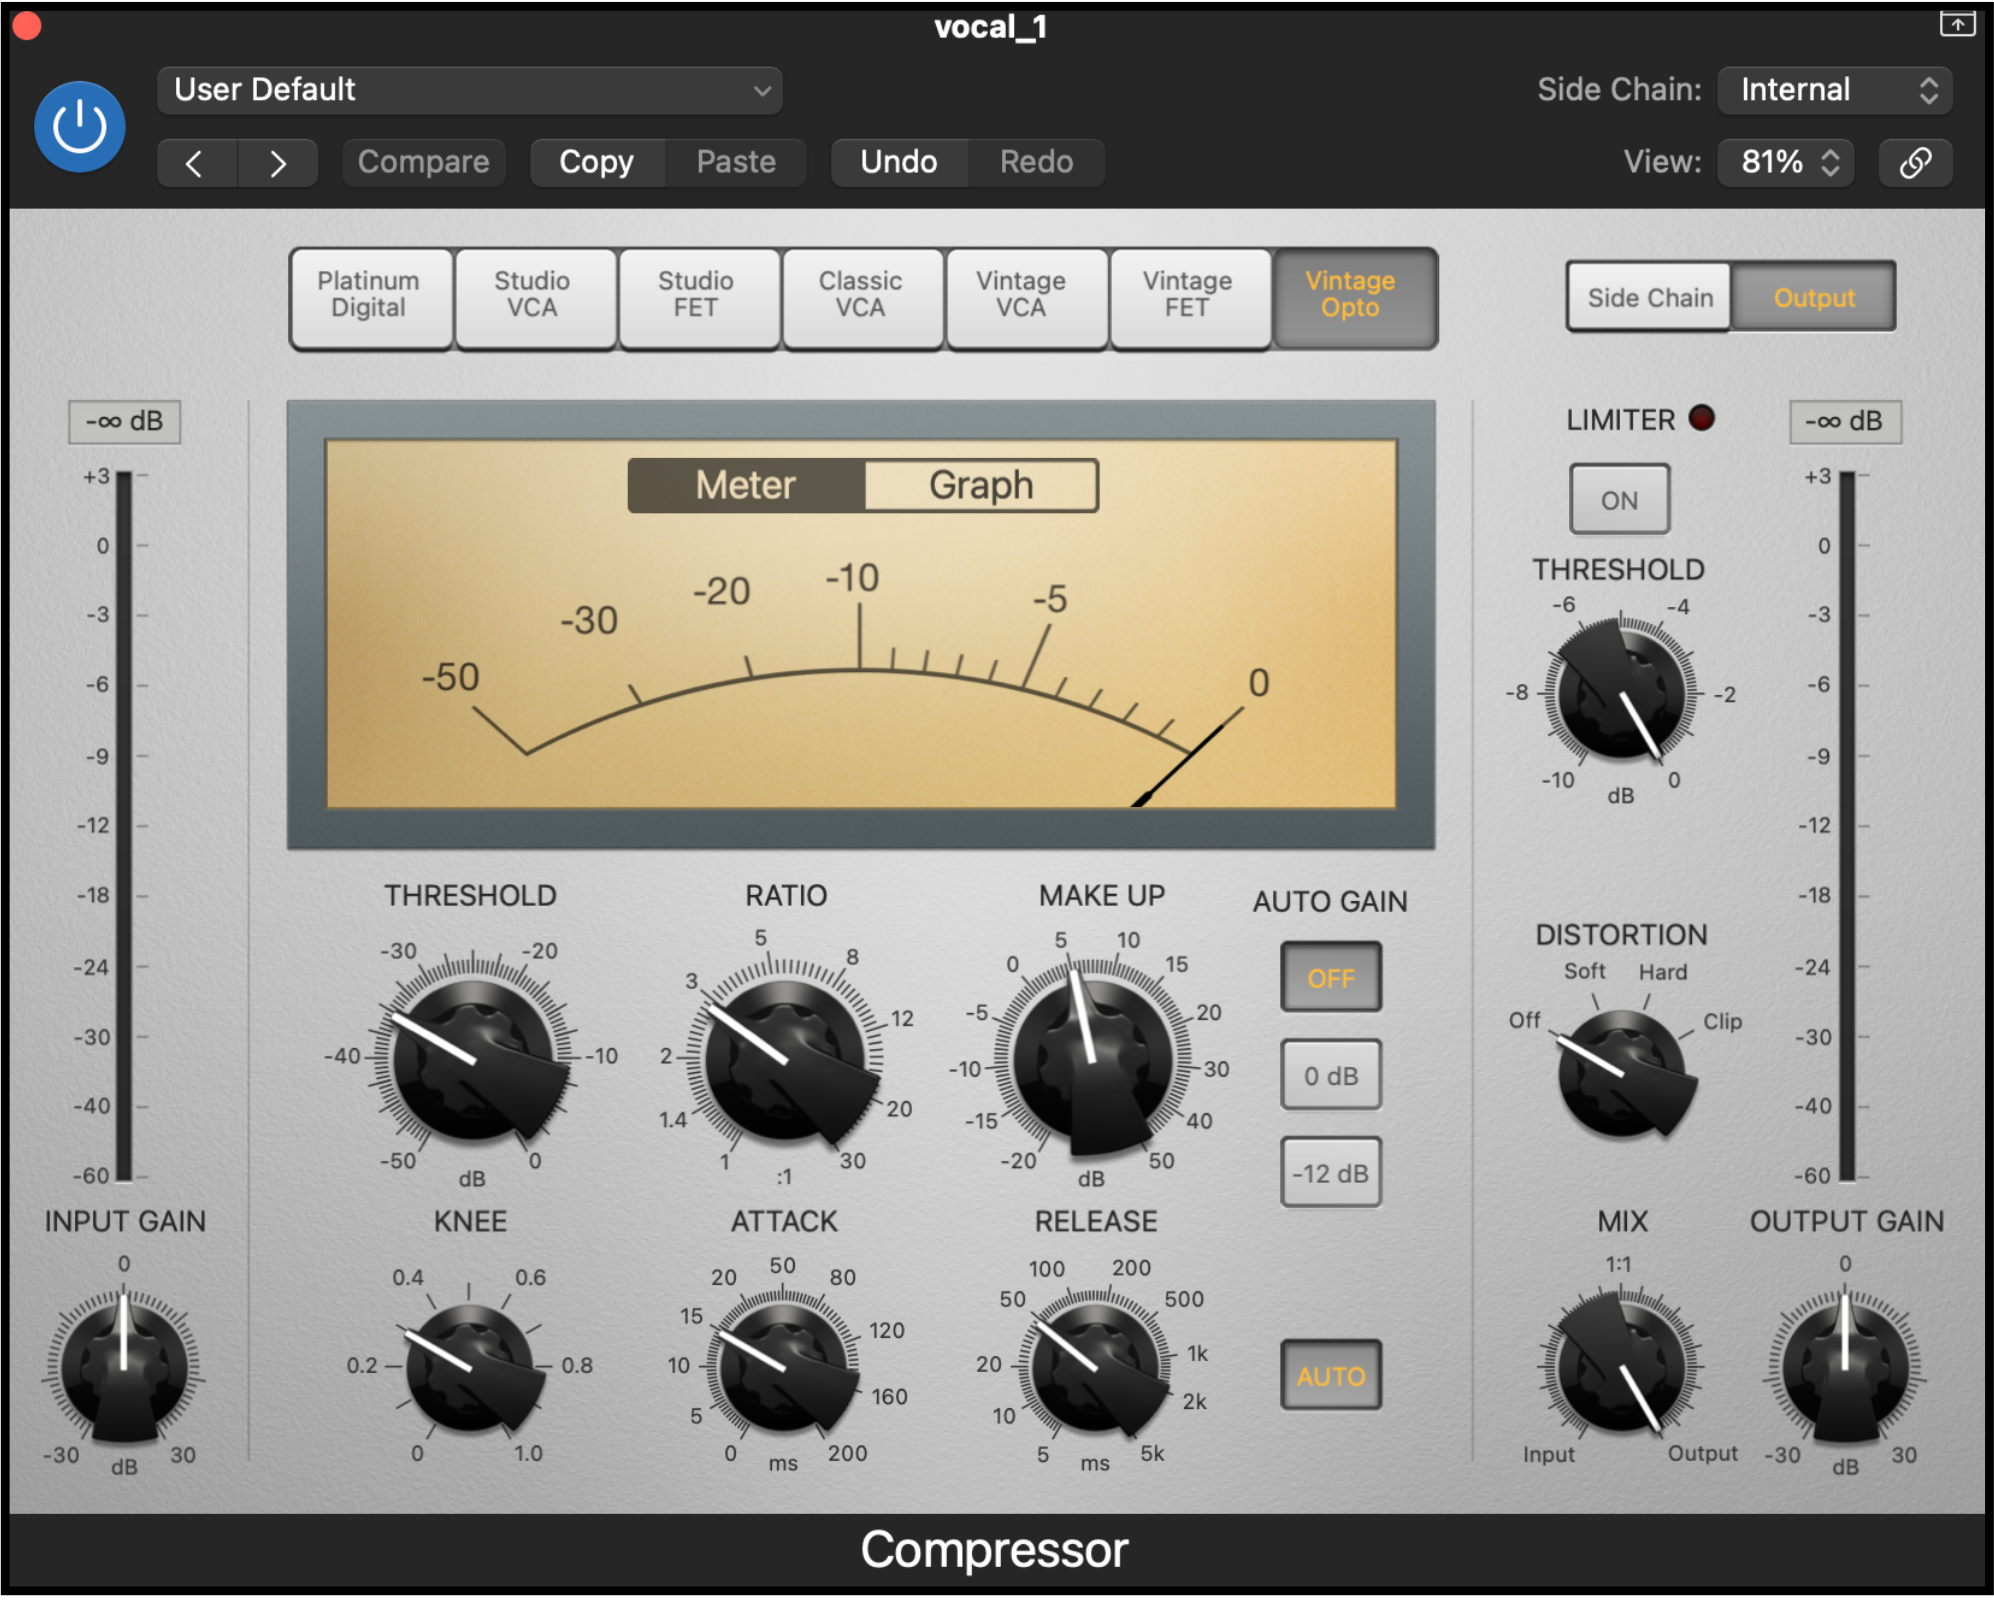
Teletronix LA2A
The first compressor I chose to use was Logics “Vintage Opto" compressor, as this is the closest plugin logic has to the Teletronix LA2A, which is also an Optical compressor.
Optical compressors aren't particularly fast, yet they are very smooth and they “usually impose more of their own character on the material being treated, making it sound larger than life.” (Sound on sound, 2003)
How would I use this compressor?
- I went for a ratio of 3:1 - which is ultimately pretty light compression. I did this because we are using a series of compressors and can build up our levels of compression over multiple compressors.
- I then balanced my compression using the threshold and attack controls. I was looking to get about -5db of compression. I went for a pretty fast attack at 15 milliseconds so that everything was guaranteed to be caught by the compressor and to hopefully make the vocal sound slightly punchier and more exciting.
- I used a similar thought process when setting the Knee control of this compressor. I chose to use a pretty hard knee at 0.3 as this squishes the audio's transients quite quickly and makes the vocals pump and feel very punchy which is a desired effect within the genre of rock.
- Lastly, I turned the auto gain off and turned the makeup gain up to about +5db so that my output signal was the same level as my input signal.
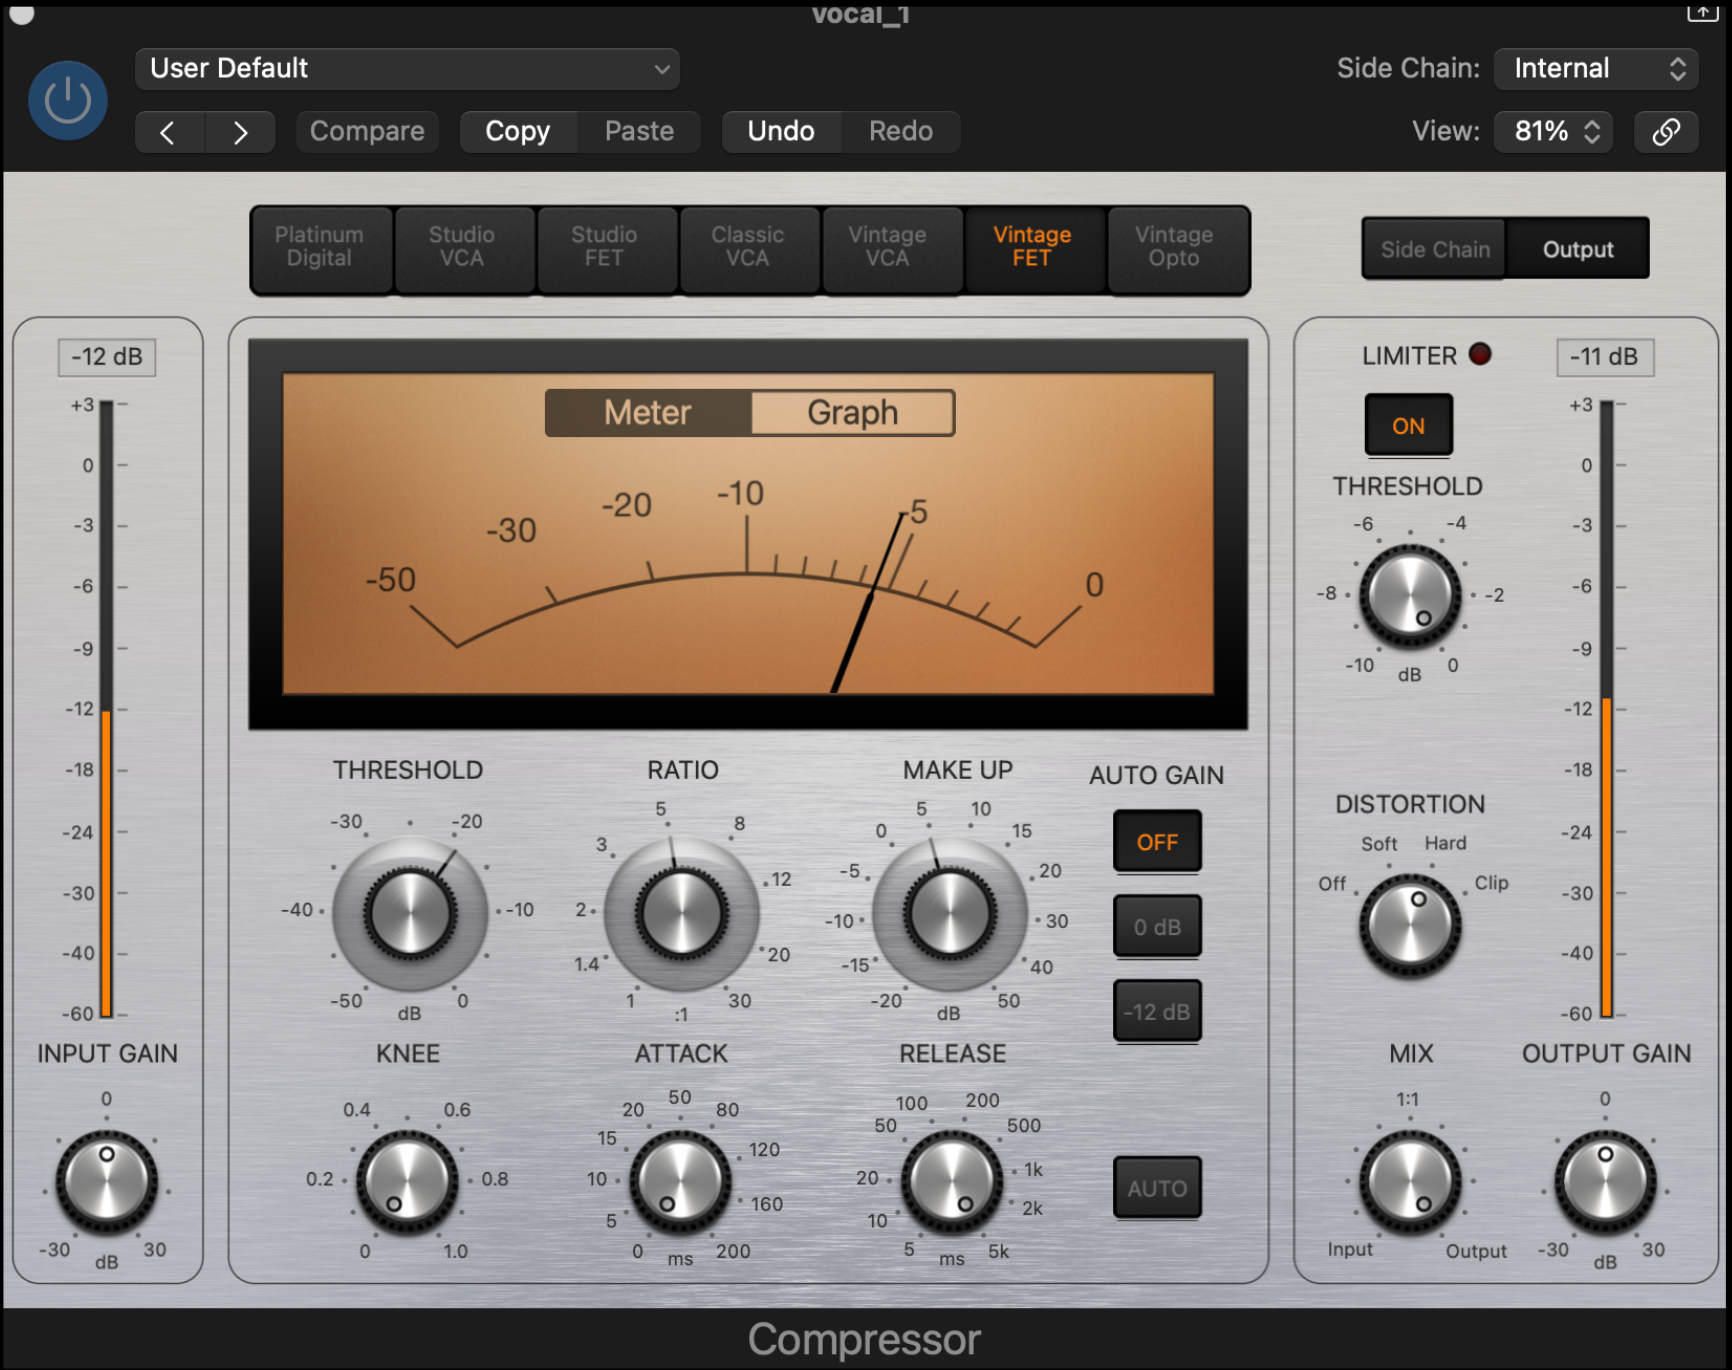
Universal Audio 1176
The next compressor I chose to use in my series of compressors was Logics “Vintage FET”. I chose this compressor as it is the most similar compressor on logic to the Universal Audio 1176 which is also a FET compressor.
I chose to use the Vintage FET over the Studio FET as Stent would have been using Analog equipment and I figured the vintage FET would be emulating a more analog sound.
How would I use this compressor?
- I upped my ratio slightly on this one to 5:1, this still ultimately isn’t a particularly heavy compression but yet again, we are doing serial compression to negate the need for extremely heavy compression over one compressor.
- I went for a fast attack as faster attack and release times tend to give you more aggression and grit which are wanted attributes within rock music.
- In comparison to my fast attack, I chose to use an extremely slow release time as having a fast attack allows the compressor to clamp down on the signal quickly and the slow release allows the gain reduction to reset at a slower rate.
- This means that the attack and sustain will be more consistent with each other.
- This compression technique is commonly used on drums. However, I enjoy the way it sounds on rock vocals.
Standard Audio Level-or
- The last thing I did was add a limiter with hard distortion to the vocal, as Stent used Standard Audio Level-or which is a limiter/distortion processor.
Parallel Distortion
Parallel distortion is when you use distortion but instead of processing the initial signal you process another version of that signal using an auxiliary send or a copy of the initial signal played in parallel with each other.
I used this mix technique on the bass on this track so that the bass would be audible on speakers with a bad bass response - such as mobile phone speakers.
Many phone speakers don’t have a good bass response, you may even lose the bass altogether when a track is played through them if the bass is only sitting within the bass’s fundamental frequencies.
However, when you add distortion to the bass, it creates lots of harmonics that differ from the fundamental, meaning we get the bass sound within higher frequencies. we would be looking for bass in around the 150hz range for it to be nice and audible on phone speakers.
I wanted my bass to sound angry. This means I needed to use distortion with both 2nd + 3rd harmonics.
Harmonics are integer multiples of the fundamental.
2nd harmonics are even harmonics meaning they sound quite nice and warm.
Whereas 3rd harmonics are odd harmonics, meaning they sound angry or nasty.
Feel free to use any kind of distortion (pedals, plugins, etc) and adjust your settings so that it fits within your mix.
Creating Acoustic Spaces - Reverb + Delay
The majority of the time, the audio we mix is recorded to be as dry as possible, meaning we have to add reverbs and delays to the audio - these haven't already been imprinted on the audio through the space it was recorded in, so we must add artificial ambiance.
I use reverbs and delays to create conceptual acoustic spaces in the mix, whether that be a real space such as a cathedral, or the grand canyon, or a fictional space such as the inside of an alien spaceship.
Some creative uses of reverb you could try are:
Reverse Reverb
“To put it simply, it’s reverb that swells in BEFORE an instrument begins to play”
Learn about how to use reverse reverb in your mix here - https://www.musicianonamission.com/reverse-reverb/
Gated reverb
Think of any 80s song, picture the sound of the snare - that’s the sound of gated reverb.
Check out this article if you want to understand what gated reverb is and how you might go about implementing it within your mixes. https://emastered.com/blog/gated-reverb
When mixing, the most important thing to remember is there is not a one size fits all approach.
You will never be able to read an article on mixing and then innately know how to mix.
You need to use your ears.
If you use the knowledge I have shared here and in part 1, alongside your most important tool -your ears, you will be able to create a well-balanced and professional-sounding mix.
Look out for more articles coming from me about recording, mixing, and the music industry in general.
Thank you for reading,
Sky-Maya Groom.